Print Crystal Report at Client Side Printer in ASP.NET
The following is the procedure.
Note: To use Crystal Reports in Visual Studio 2010, you need to download CRforVS_13_0.exe and install it.
Step 1
Note: To use Crystal Reports in Visual Studio 2010, you need to download CRforVS_13_0.exe and install it.
Step 1
Create a new Dataset in your existing project.
In Solution Explorer select Add New Item, then Dataset1.
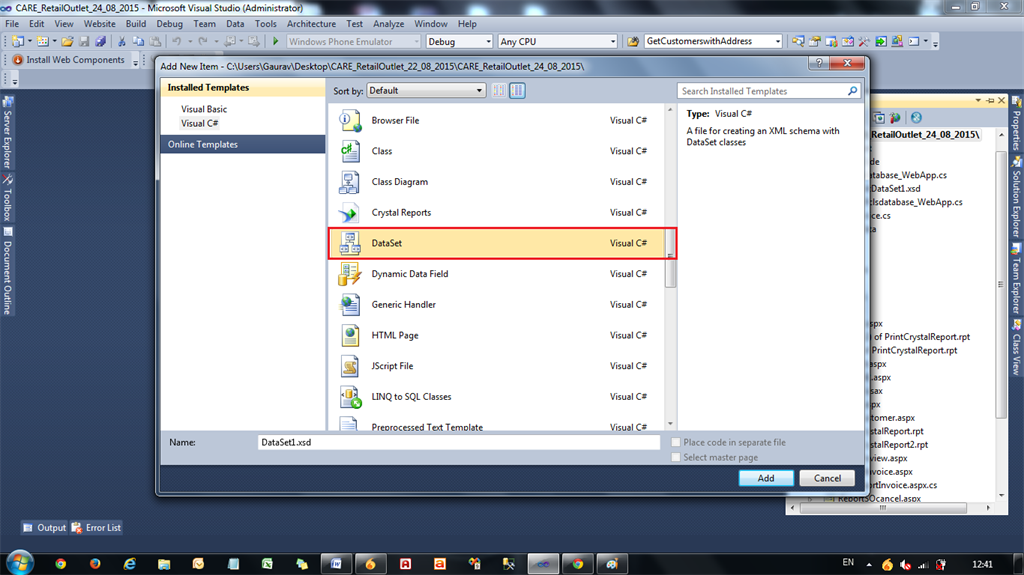
In Solution Explorer select Add New Item, then Dataset1.

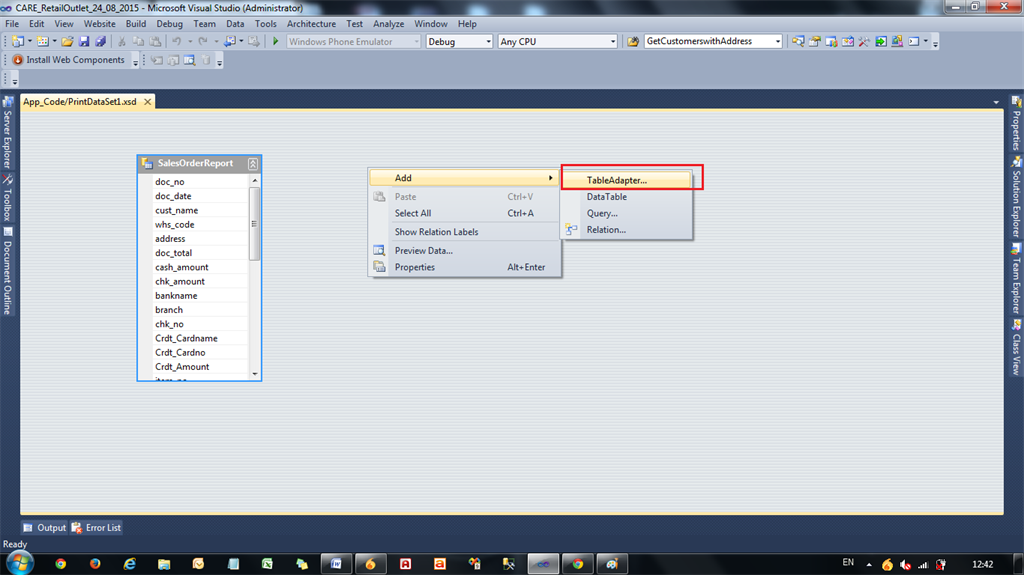
Step 2
In Dataset Add, then click Table Adapter.
Step 3

Step 3
In this Table Adapter, Add Columns depending on the Database Tables fields.
Note: In this Table Adapter the column name must be the same as the database table fields.
Step 4
Note: In this Table Adapter the column name must be the same as the database table fields.
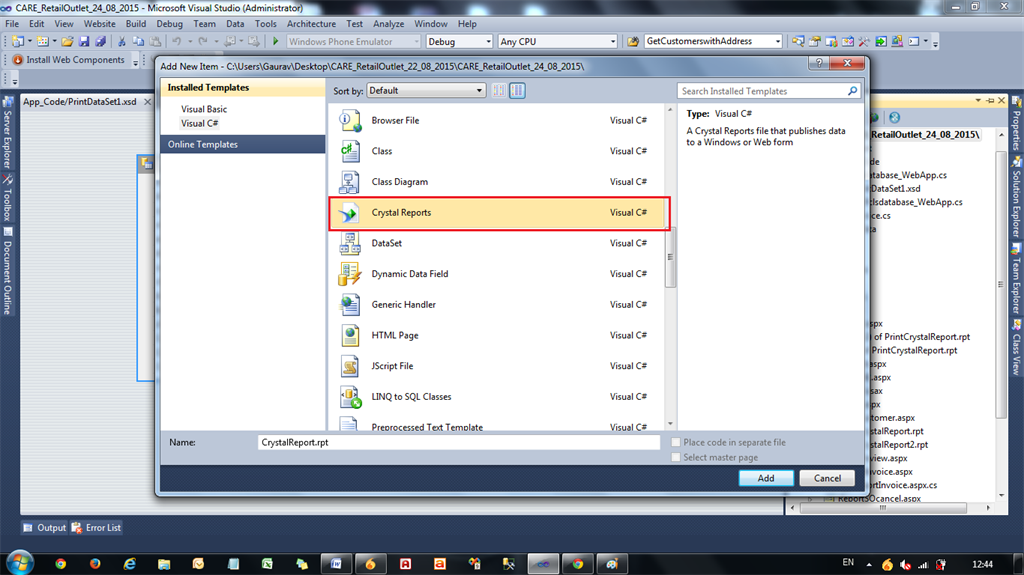
Step 4
Add New Item, then select Crystal Reports.
Step 5

Step 5
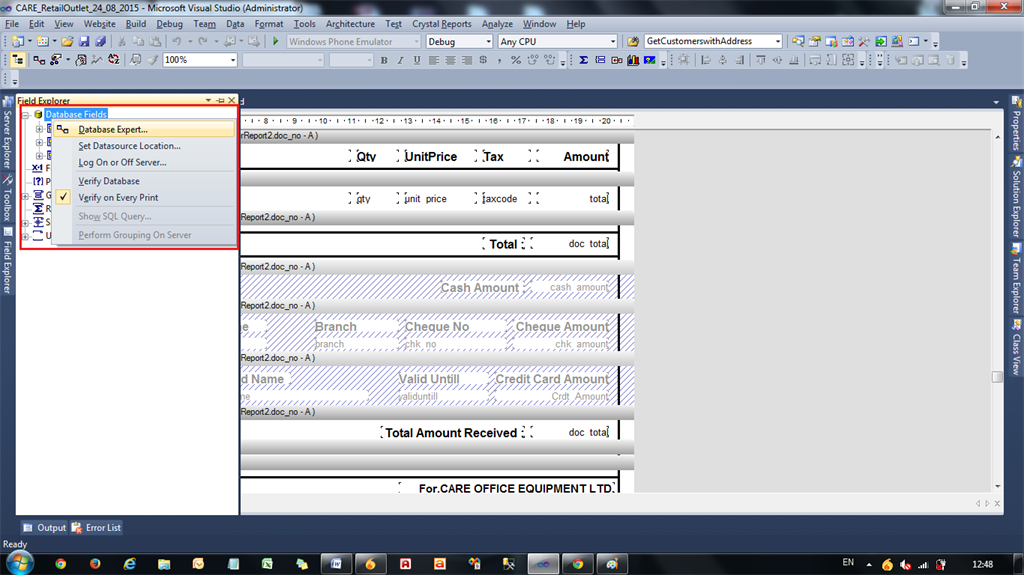
In the Crystal Reports Field Explorer Menu select Database Fields -> Database Expert.
Step 6

Step 6
Choose the previously created Dataset from the List then drag any DataTableAdapter to the right side.
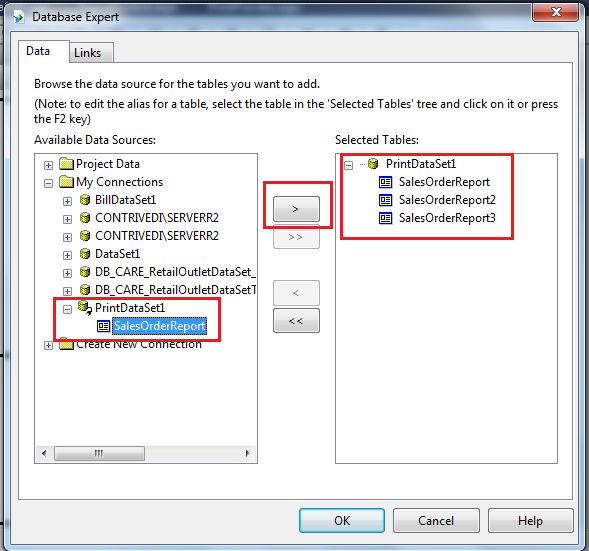
Click Next
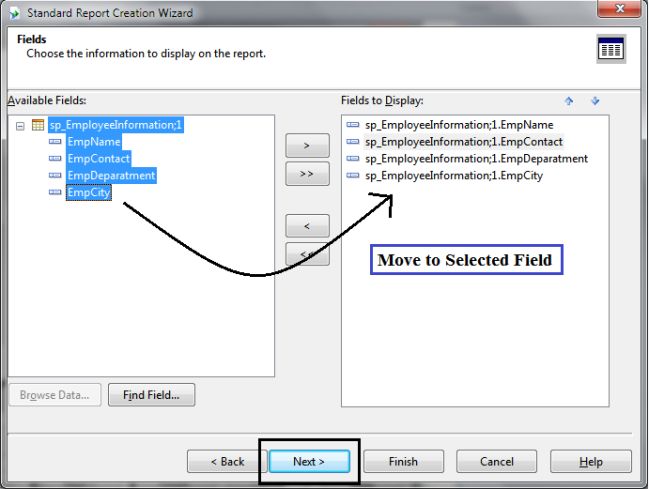
Choose the field to display.
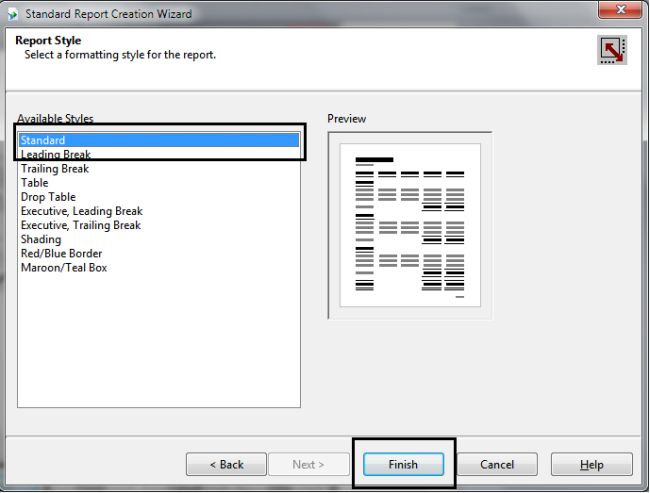
Choose Report Display Format.
Click Finish.
Step 7

Click Next

Choose the field to display.

Choose Report Display Format.
Click Finish.
Step 7
After binding with the Dataset, design the Crystal Reports report by dragging fields one by one to the Crystal Reports report.
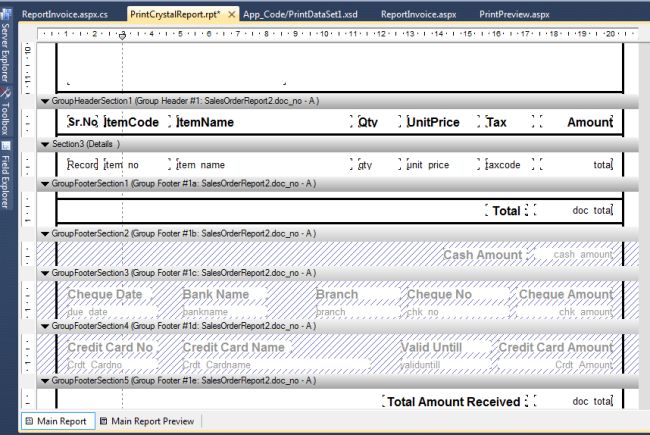
Finally your Design Page is ready as in the image.
Step 8

Finally your Design Page is ready as in the image.
Step 8
Now select Add New Item and name it NewWebform.aspx.
Step 9
Step 9
Add the CrystalReportViewer to NewWebform.aspx. Do not choose a Report Source.
Step 10
Step 10
Now write code to view the data in Crystal Reports depending on your condition.
Code Behind
For the preview of Crystal Report Data:
Code Behind
For the preview of Crystal Report Data:
- using System.Data.SqlClient;
- using System.Data;
- using CrystalDecisions.CrystalReports.Engine;
- using System.Configuration;
- public partial class ReportInvoice: System.Web.UI.Page {
- SqlDataAdapter sqlda = new SqlDataAdapter();
- SqlCommand com = new SqlCommand();
- DataTable dt;
- PrintDataSet1 ds = new PrintDataSet1();
- ReportDocument rptDoc = new ReportDocument();
- protected void Page_Load(object sender, EventArgs e) {
- if (!IsPostBack) {
- bindCrystal();
- }
- }
- public void bindCrystal() {
- SqlConnection conn = new SqlConnection(ConfigurationManager.ConnectionStrings["con1"].ConnectionString);
- dt = new DataTable();
- dt.TableName = "Crystal Report Example";
- com.Connection = conn;
- string sql = "SELECT * from Table1 "; // As per condition
- com.CommandText = sql;
- sqlda = new SqlDataAdapter(com);
- sqlda.Fill(dt);
- ds.Tables[0].Merge(dt);
- rptDoc.Load(Server.MapPath("PrintCrystalReport.rpt"));
- rptDoc.SetDatabaseLogon("Username", "password", @"IPADDRESS\SERVERR2", "DB_DatabaseName");
- rptDoc.SetDataSource(ds);
- CrystalReportViewer1.ReportSource = rptDoc;
- }
- }
Finally, the Print Preview is done in the Crystal Report Viewer.
Procedure to Print this Report from a client-side printer.
UI Design Side
Step 11
Procedure to Print this Report from a client-side printer.
UI Design Side
Step 11
Add a HTML button (Print button) to the Webform, not asp:Button.
- <input id="btnPrint" type="button" value="Print" onclick="Print()" />
- <div id="dvReport">
- <CR:CrystalReportViewer ID="CrystalReportViewer1" runat="server"AutoDataBind="true" ToolPanelView="None" EnableDatabaseLogonPrompt="False"PrintMode="Pdf" />
- </div>
- <script type="text/javascript">
- function Print() {
- var dvReport = document.getElementById("dvReport");
- var frame1 = dvReport.getElementsByTagName("iframe")[0];
- if (navigator.appName.indexOf("Internet Explorer") != -1 || navigator.appVersion.indexOf("Trident") != -1) {
- frame1.name = frame1.id;
- window.frames[frame1.id].focus();
- window.frames[frame1.id].print();
- } else {
- var frameDoc = frame1.contentWindow ? frame1.contentWindow : frame1.contentDocument.document ? frame1.contentDocument.document : frame1.contentDocument;
- frameDoc.print();
- }
- }
- </script>
Step 12
Browser Side
Now you can run the report in the browser and see the following:
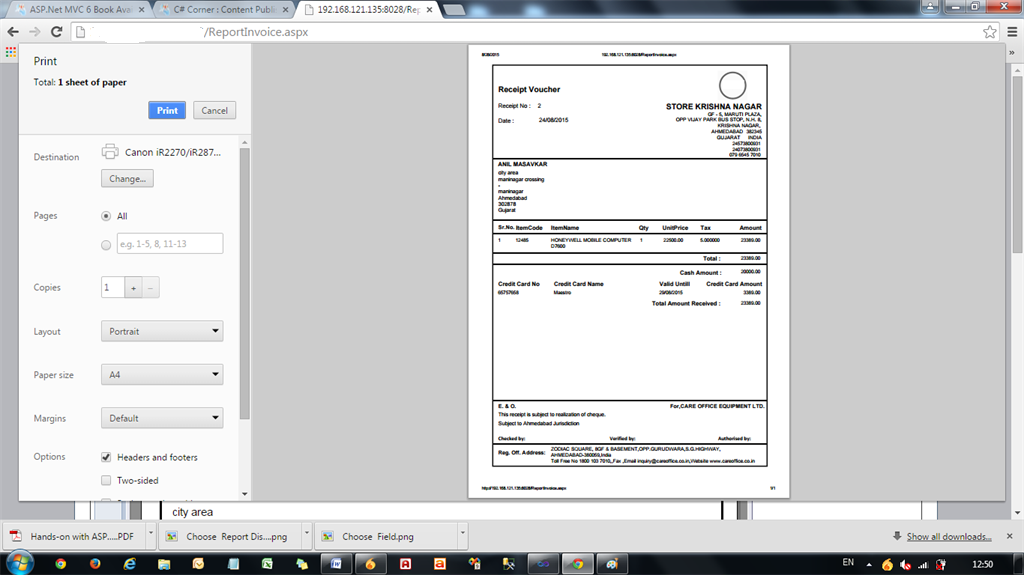
Finally, the printing is done perfectly.
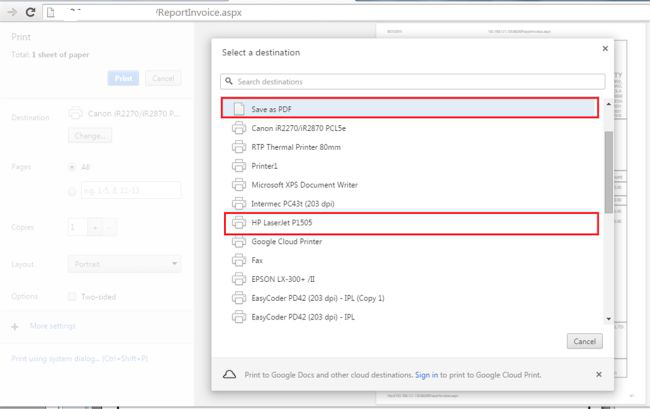
Note: If you want to change the printer then click on the Change Button and you can save this file as a PDF from this option.
Note: If you want to not print the header and footer URL and PageNo and Page1of1, then UncheckHeaders and Footers option.
I hope you liked my article. If you have any query regarding this, feel free to comment for me.
Browser Side
Now you can run the report in the browser and see the following:

Finally, the printing is done perfectly.
Note: If you want to change the printer then click on the Change Button and you can save this file as a PDF from this option.

Note: If you want to not print the header and footer URL and PageNo and Page1of1, then UncheckHeaders and Footers option.
I hope you liked my article. If you have any query regarding this, feel free to comment for me.
No comments:
Post a Comment